JSignPdf User Guide
Introduction
JSignPdf is an open-source application that adds digital signatures to PDF documents. It’s written in the Java programming language and can be launched on most current operating systems. Users can control the application using a modern JavaFX graphical interface, the classic Swing GUI, or command line arguments. Main features:
supports visible signatures
can set certification level
supports PDF encryption with setting rights
timestamp support
certificate revocation checking (CRL and/or OCSP)
License
JSignPdf is released under LGPL and/or MPL license. It can be freely used for both personal and commercial use. For details look directly to the license files.
History
The project started at the beginning of 2008.
A greater change comes in 2021, where the project was switched to use the OpenPDF library instead of the old version of the iText library.
Starting with version 3.0.0, JSignPdf ships with a new document-centric JavaFX interface as the default graphical frontend. The classic Swing GUI remains available for backward compatibility.
Author
The author of JSignPdf is Czech developer Josef (kwart) Cacek. He works in Java since 2000. Some links to Josef’s projects:
Getting support
If you don’t find the relevant information in this document or on the JSignPdf GitHub page (https://github.com/intoolswetrust/jsignpdf), use the JSignPdf Google Group to ask the community.
Installation and prerequisites
Downloading JSignPdf
JSignPdf releases are available on the GitHub releases page:
Each release provides the following artifacts:
| Artifact | Description |
|---|---|
| Platform-independent ZIP archive containing the JAR files ( |
| Windows 64-bit EXE installer. Bundles its own Java runtime, installs to Program Files by default, creates Start Menu shortcuts and registers an Add/Remove Programs entry. |
| Windows 64-bit MSI installer. Functionally equivalent to the EXE installer; preferred for deployment via group policy or enterprise software-distribution tools. |
| Windows 64-bit portable ZIP. Contains the fully packaged application (including a bundled JRE); just unzip and run |
| 32-bit Windows is no longer supported by the dedicated Windows installers. Users on 32-bit Windows can still run JSignPdf from the platform-independent ZIP with their own 32-bit JRE. |
Java
If you use the platform-independent ZIP archive, you need Java Runtime Environment (JRE) version 11 or newer. You can download it freely from the web, for instance:
| The Windows EXE / MSI / portable ZIP variants all bundle their own JRE, so a separate Java installation is not required on Windows. |
Obtaining a keystore
To sign PDF documents you need a keystore containing your private key. If you don’t have one yet:
For testing, you can generate a self-signed certificate with the
keytoolutility that ships with Java:keytool -genkeypair -alias mykey -keyalg RSA -keysize 2048 -keystore keystore.p12 -storetype PKCS12For production use, obtain a certificate from a trusted Certificate Authority (CA). The CA will typically issue a PKCS#12 (
.p12/.pfx) file.
The most common keystore types supported by Java are:
PKCS#12 — keys stored in
.p12and.pfxfilesPKCS#11 — keys stored usually on hardware modules (see Using hardware tokens for signing)
JKS (Java Key Store)
WINDOWS-MY — supported on MS Windows. You can use directly your certificates imported into your system.
JSignPdf has been also extended to support external keystore types like smart cards, or network HSMs. The first example is CloudFoxy (https://gitlab.com/cloudfoxy).
Demo files
Every release bundles a small demo/ folder so you can try JSignPdf immediately without generating your own certificate or finding a sample PDF:
| File | Description |
|---|---|
| Sample unsigned PDF document. |
| Demo PKCS#12 keystore with a self-signed certificate for |
| Walk-through of the most common command-line scenarios (basic signature, visible signature, timestamped signature with FreeTSA, appending a signature, listing keys). |
You can find the folder:
at the top level of the platform-independent ZIP (
jsignpdf-${VERSION}.zip)under
<install dir>\app\demo\after installing with the Windows EXE / MSI installerunder
JSignPdf\app\demo\in the Windows portable ZIP (JSignPdf-${VERSION}-win-x64.zip)
| The bundled keystore is meant purely for experimentation. Do not use it to sign real documents. |
Launching JSignPdf
From the Windows installer or portable ZIP
When JSignPdf is installed via the Windows EXE / MSI installer (or extracted from the win-x64.zip portable archive), four launchers are available:
| Launcher | Purpose |
|---|---|
| Starts the JavaFX graphical interface (the default). Also available as a Start Menu shortcut after installation. |
| Starts the classic Swing graphical interface (equivalent to passing |
| Console-mode launcher for the signer. Use this in batch scripts, CI pipelines or whenever you want the output to appear in the current terminal window. |
| Command-line tool for importing a server certificate into the bundled JRE’s |
All four launchers share the bundled JRE — you do not need to have Java installed separately. For installer-based deployments the launchers live in <install dir>\ (with Start Menu shortcuts to the GUI launchers); in the portable ZIP they are directly in the extracted folder.
From the platform-independent ZIP
All platforms (with Java 21 or newer installed) can run the JAR file JSignPdf.jar directly. Use the following command in the directory where the application is located:
$ java -jar JSignPdf.jar
On Linux and macOS a convenience shell script is bundled in bin/jsignpdf.sh which adds the JVM options required on Java 21+ and then launches the JAR.
By default, JSignPdf opens the JavaFX graphical interface (see Using the JavaFX UI). To start the classic Swing GUI instead, set the jsignpdf.swing system property:
$ java -Djsignpdf.swing=true -jar JSignPdf.jar
If command line arguments for signing are provided, JSignPdf runs in batch mode without opening any GUI (see Command line (batch mode)).
Using the JavaFX UI
The JavaFX interface is the default graphical frontend for JSignPdf. It uses a document-centric workflow: you open a single PDF, configure the signature, and sign it. For signing multiple files in one go, use the command line.
Opening a PDF document
When JSignPdf starts, the main window is empty and invites you to load a document. You can either drag and drop a PDF file onto the window or use File > Open (or the Open button in the toolbar).
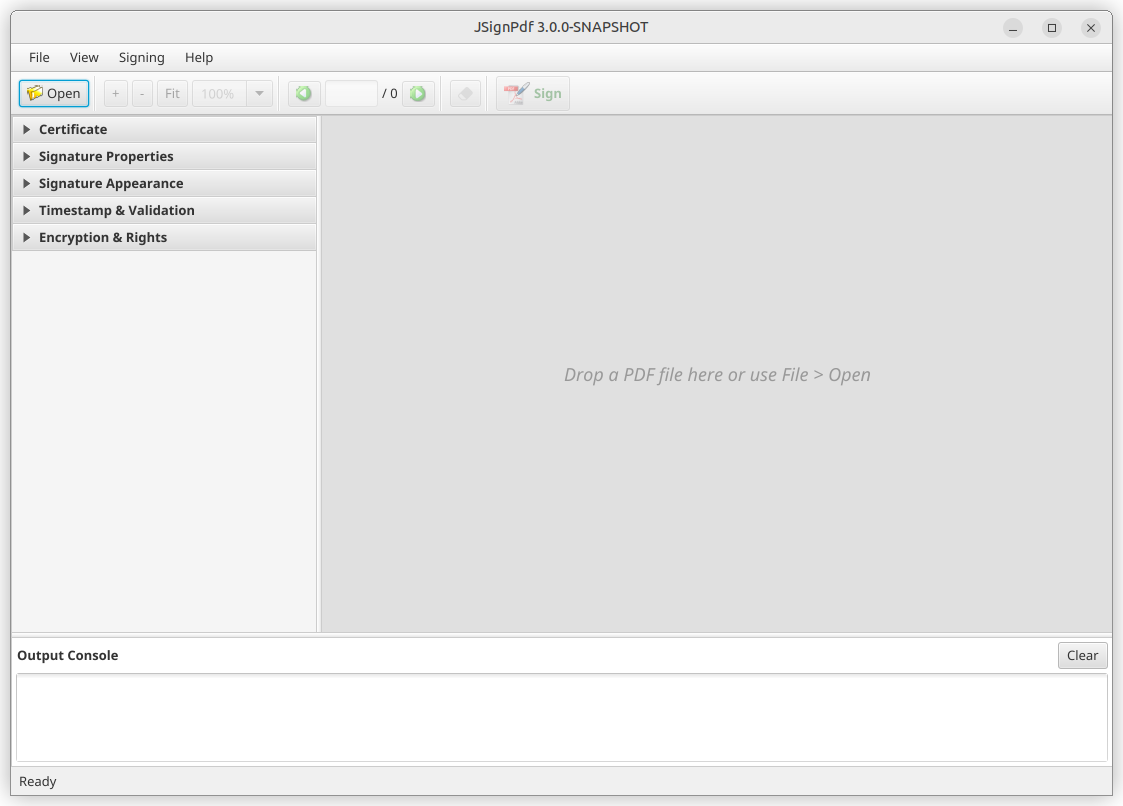
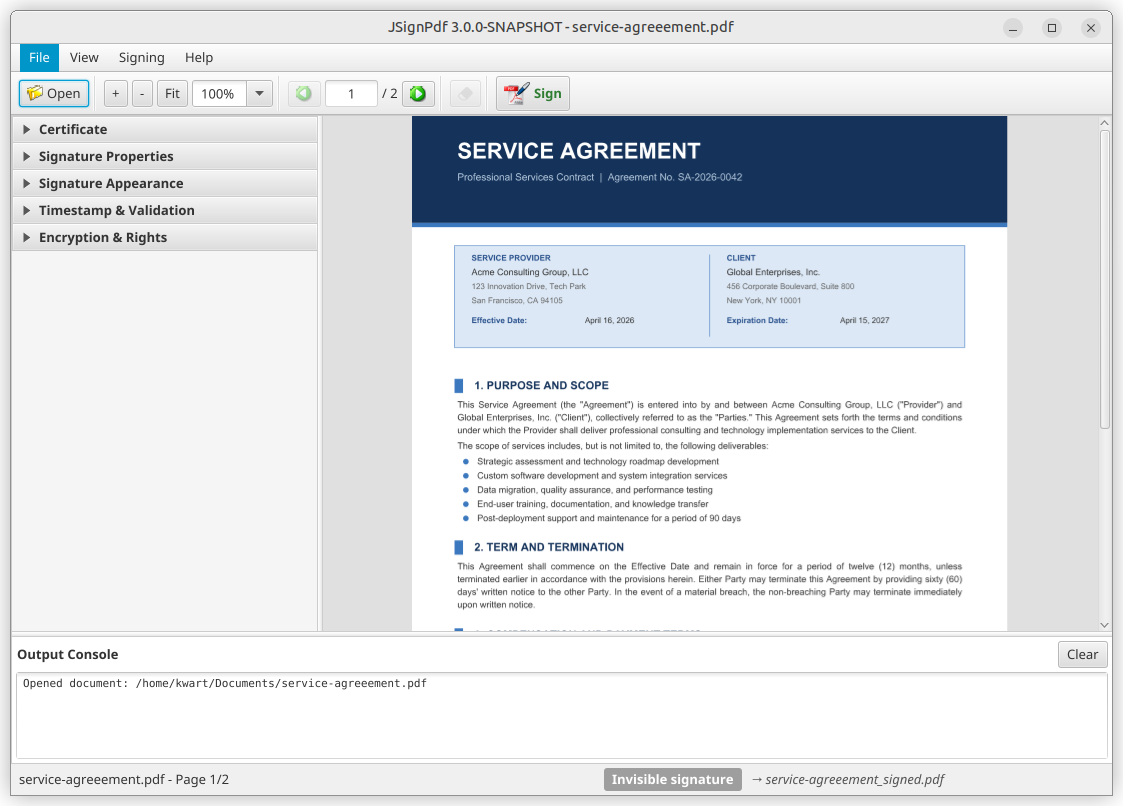
Once a PDF is loaded, the document preview appears on the right, and the configuration panels on the left become active. The status bar at the bottom shows the file name and page count.
Configuring signature options
The left sidebar contains five collapsible panels that expose all signing options. Expand a panel by clicking its header.
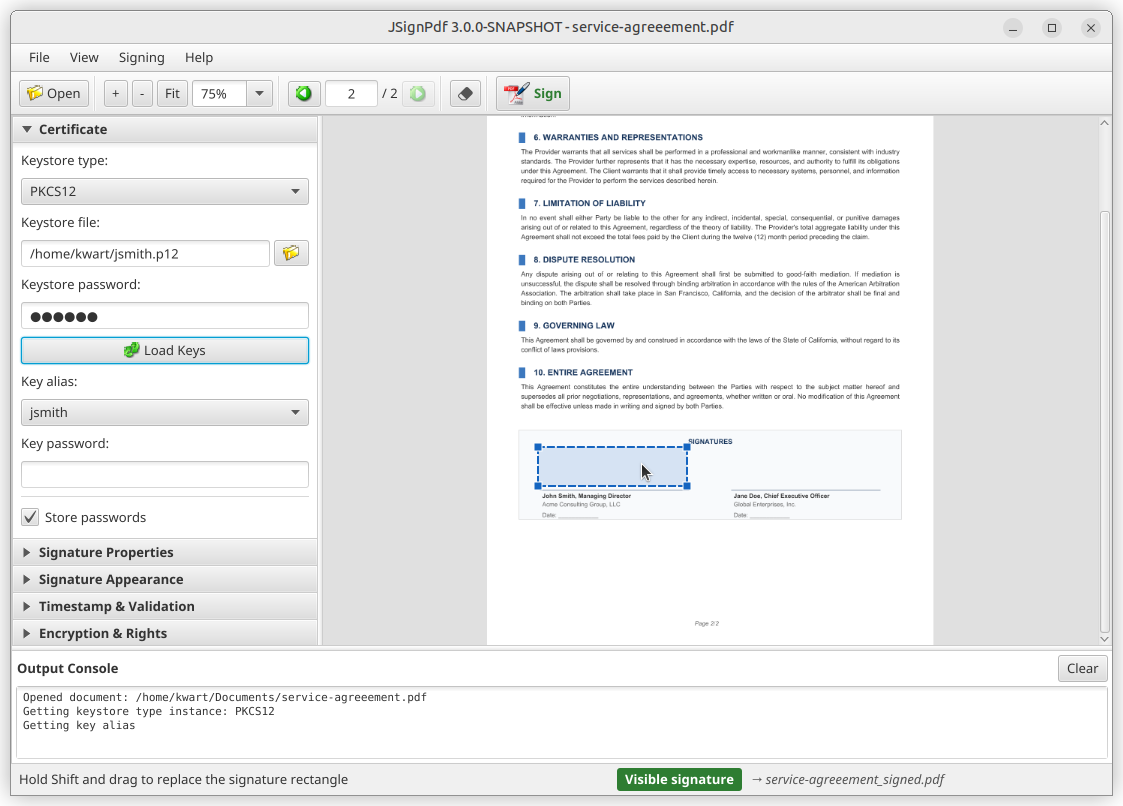
Certificate — keystore type, keystore file & password, key alias & password (see Keystore selection and Key alias & key password)
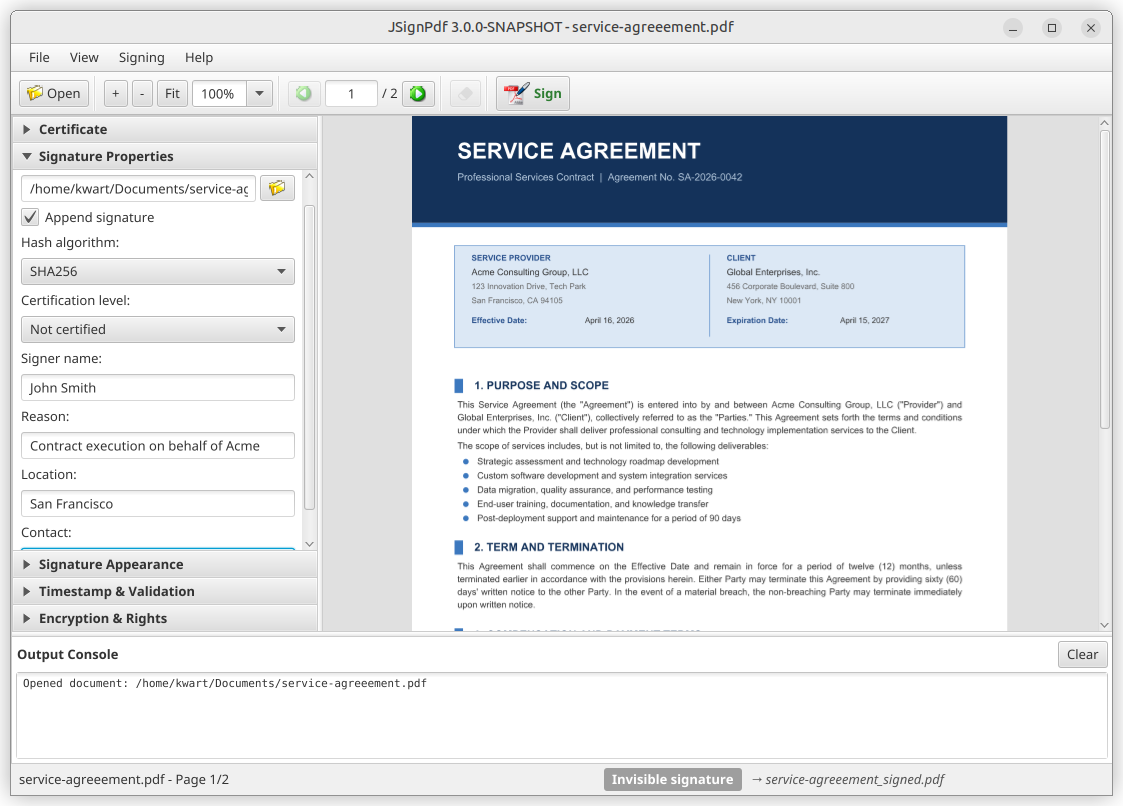
Signature Properties — hash algorithm, certification level, append mode, reason / location / contact, input & output file paths (see Signing properties)
Signature Appearance — visible signature toggle, render mode, texts, images, font size (see Visible signature options)
Timestamp & Validation — TSA server, CRL, OCSP (see TSA — timestamps and Certificate revocation checking)
Encryption & Rights — encryption mode, passwords, certificate, document rights (see Encryption)
At a minimum, you need to select a keystore and provide its password in the Certificate panel. All other options have sensible defaults.
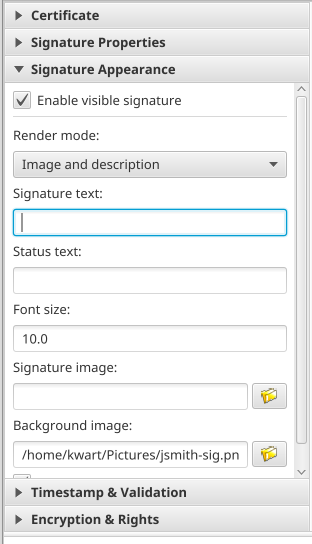
Placing a visible signature
To add a visible signature to the PDF, enable Visible signature in the Signature Appearance panel. You can then configure the render mode, signature text, status text, images, and font size.
To position the signature on the page, hold Shift and drag a rectangle directly on the document preview. The coordinates are updated automatically in the sidebar.
Signing the document
When you are ready, click the Sign button in the toolbar. JSignPdf signs the document and displays the result in the Output Console at the bottom of the window.
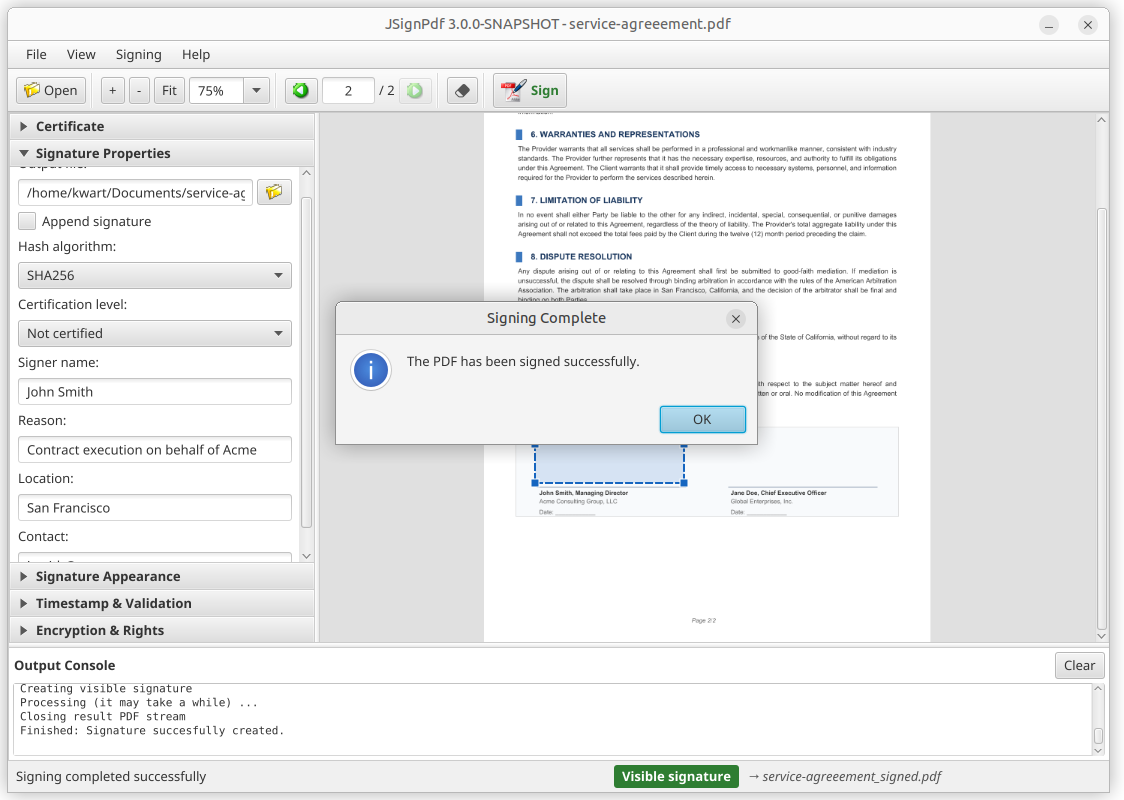
The signed PDF is saved to the output path shown in the Signature Properties panel. By default, it is the input file name with a _signed suffix (e.g. document_signed.pdf).
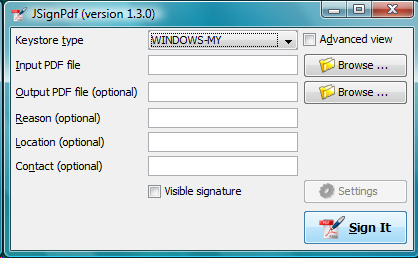
Classic Swing UI
The classic Swing GUI is the original graphical interface from earlier versions of JSignPdf. It remains available for backward compatibility. To start it, set the jsignpdf.swing system property:
$ java -Djsignpdf.swing=true -jar JSignPdf.jar
The Swing GUI opens in a simplified view. Fill in the keystore type, keystore file and password, the input PDF file, and press Sign It.
Select the Advanced view checkbox to access additional options such as key alias, append signature, certification level, hash algorithm, encryption, visible signature, TSA, and certificate revocation settings.
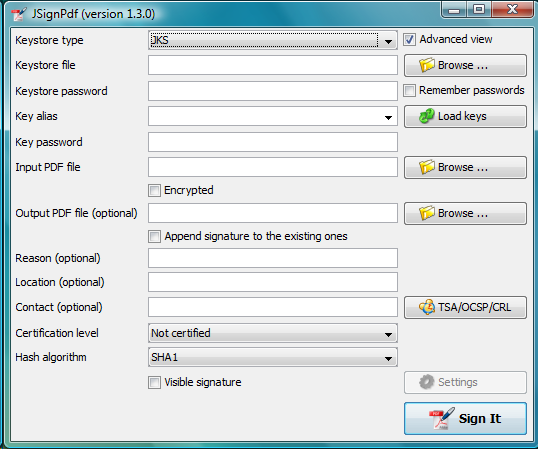
All options available in the Swing GUI correspond to the options described in the Signing options chapter.
Command line (batch mode)
JSignPdf can be used in batch mode to sign one or more PDF files from the command line. This is useful for scripting and for signing multiple files at once.
The options are grouped by category below. For detailed descriptions of each option, see the Signing options chapter.
usage: java -jar JSignPdf.jar [file1.pdf [file2.pdf ...]] [-a] [--bg-path
       <file>] [--bg-scale <scale>] [-c <contact>] [-cl <level>] [--crl] [-d
       <path>] [--disable-acrobat6-layer-mode] [--disable-assembly]
       [--disable-copy] [--disable-fill] [--disable-modify-annotations]
       [--disable-modify-content] [--disable-screen-readers] [-e] [-ec <file>]
       [-fs <size>] [--gui] [-h] [-ha <algorithm>] [--img-path <file>] [-ka <alias>]
       [-ki <index>] [-kp <password>] [-ksf <file>] [-ksp <password>] [-kst
       <type>] [-l <location>] [--l2-text <text>] [--l4-text <text>] [-lk]
       [-lkt] [-llx <position>] [-lly <position>] [-lp] [-lpf <file>] [--ocsp]
       [--ocsp-server-url <responderUrl>] [-op <prefix>] [-opwd <password>] [-os
       <suffix>] [-pe <mode>] [-pg <pageNumber>] [-pr <right>] [--proxy-host
       <hostname>] [--proxy-port <port>] [--proxy-type <type>] [-q] [-r
       <reason>] [--render-mode <mode>] [-sn <signer>] [-ta <method>] [-ts <URL>]
       [--tsa-policy-oid <policyOID>] [-tscf <file>] [-tscp <password>] [-tsct
       <ks-type>] [-tsh <algorithm>] [-tsp <password>] [-tsu <username>] [-upwd
       <password>] [-urx <position>] [-ury <position>] [-v] [-V]
General options
| Option | Description |
|---|---|
| Prints the help screen. |
| Shows the application version. |
| Quiet mode — suppresses info messages during signing. |
| (Beta) Show the GUI even when other command line arguments are provided. |
| Lists available keystore types (use as values for |
| Lists keys in the chosen keystore. |
| Loads properties from the default file (created by the GUI application). |
| Loads properties from the given file. The file can be created by copying the default property file |
Keystore and key options
See Keystore selection and Key alias & key password for details.
| Option | Description |
|---|---|
| Sets the keystore type. Use |
| Path to the keystore file ( |
| Password for the keystore. |
| Name (alias) of the key to use for signing. If not given, the first key in the keystore is used. Use |
| Zero-based index of the key to use. Lower priority than |
| Password for the individual key (if different from the keystore password). |
Signature options
See Signing properties for details.
| Option | Description |
|---|---|
| Append signature to existing ones instead of replacing them. |
| Hash algorithm for the signature. Default: |
| Certification level. Default: |
| Signer name. Defaults to the common name (CN) of the chosen certificate. |
| Reason for the signature. Empty by default. |
| Location of the signature (e.g. Washington DC). Empty by default. |
| Signer’s contact details. |
Output options
| Option | Description |
|---|---|
| Folder for signed documents. Default: current folder. |
| Prefix for the signed filename. Default: empty. |
| Suffix for the signed filename. Default: |
Visible signature options
See Visible signature options for details.
| Option | Description |
|---|---|
| Enables a visible signature. |
| Page for the visible signature. Default: |
| Lower left corner X-axis position (negative value is subtracted from page width). |
| Lower left corner Y-axis position (negative value is subtracted from page height). |
| Upper right corner X-axis position (negative value is subtracted from page width). |
| Upper right corner Y-axis position (negative value is subtracted from page height). |
| Render mode. Default: |
| Signature text. Supports placeholders: |
| Status text. |
| Font size for signature text. Default: |
| Image path for the visible signature. |
| Background image path for the visible signature. |
| Background image scale. Positive: multiply size. Zero: stretch to fill. Negative: best-fit resize. |
| Disable Acrobat 6 layer mode (creates all signature layers instead of just n2 and n4). |
Encryption and rights options
See Encryption for details.
| Option | Description |
|---|---|
| Encryption mode. Default: |
| Deprecated. Use |
| Owner password for encrypted documents. |
| User password for encrypted documents. |
| Path to certificate file for |
| Printing rights. Default: |
| Deny copy in encrypted documents. |
| Deny assembly in encrypted documents. |
| Deny fill in encrypted documents. |
| Deny modifying annotations in encrypted documents. |
| Deny modifying content in encrypted documents. |
| Deny screen readers in encrypted documents. |
TSA and certificate validation options
See TSA — timestamps and Certificate revocation checking for details.
| Option | Description |
|---|---|
| Address of the timestamping server (TSA). Enables timestamping. |
| TSA authentication method. Default: |
| TSA username (for |
| TSA password (for |
| Path to keystore file with private key for TSA |
| Password for the TSA certificate keystore. |
| Keystore type for TSA certificate authentication. Default: |
| Hash algorithm for TSA queries. Default: |
| TSA policy OID to include in the timestamp request. |
| Enable OCSP certificate validation. |
| Default OCSP server URL (used when the signing certificate doesn’t contain one). |
| Enable CRL certificate validation. |
Proxy options
See Proxy settings for details.
| Option | Description |
|---|---|
| Proxy type. Default: |
| Hostname or IP address of the proxy server. |
| Port of the proxy server. Default: |
Program exit codes
| Code | Meaning |
|---|---|
0 | Program finished without errors. |
1 | Command line is in a wrong format. |
2 | No operation requested — e.g. no file for signing provided. |
3 | Signing of some, but not all, files failed. |
4 | Signing of all files failed. |
5 | Input file cannot be read. |
6 | Common error. |
Examples
Sign a PDF using the Windows certificate store:
$ java -jar JSignPdf.jar -kst WINDOWS-MY mydocument.pdfSign and encrypt a PDF, disabling printing:
$ java -jar JSignPdf.jar -kst PKCS12 -ksf my_certificate.pfx \
  -ksp myPrivateKeystorePassword -ka cert23 \
  -pe PASSWORD -opwd xxx123 -upwd 123xxx \
  -pr DISALLOW_PRINTING mydocument.pdf
List available keystore types:
$ java -jar JSignPdf.jar -lktList key aliases in a keystore (quiet mode):
$ java -jar JSignPdf.jar -kst PKCS12 -ksf my_certificate.pfx \
  -ksp myVeryPrivatePassword -lk -q
Signing options
This chapter describes all signing options in detail. The options are the same regardless of which interface you use (JavaFX GUI, Swing GUI, or command line). In the JavaFX interface the options are organized into sidebar panels; the corresponding panel name is noted in each section header.
Keystore selection
JavaFX panel: Certificate
The Keystore means the location where the private keys are located.
By default, JSignPdf displays keystore types provided by Java Runtime itself and the Bouncy Castle cryptographic provider.
JSignPdf has been extended to support remote/external keystore types. The first entry is "CloudFoxy" (https://gitlab.com/cloudfoxy), which is a REST API for physical smart cards, initially developed to support eIDAS signatures.
If you use PKCS#12 or Java keystore types (JKS, JCEKS), you have to select the file where the keys are stored and provide the password of this file. Path to the keystore file can be inserted directly by typing or you can use the browse button to navigate through the file system with Open File Dialog.
Key alias & key password
JavaFX panel: Certificate
When you have more private keys stored in the keystore, you can select which one will be used to sign the PDF file by filling the Key alias field. Either you can type alias name directly (combo box is editable) or you can load all names by pressing the Load keys button and then select one from the drop-down list.[1]
If you don’t fill the Key alias field the first alias read from keystore will be used.
Each key in the keystore can be protected with its password. If this password differs from the password of keystore, fill it in the Key password input field.
Signing properties
JavaFX panel: Signature Properties
Input and output PDF files
Input PDF file is the existing PDF file to which a digital signature will be added.
Output PDF file is the name of the resulting PDF file. If not specified, the Input PDF file name with the suffix signed is used automatically (e.g. input _test.pdf will produce test_signed.pdf)
*The Input and Output files have to be different!*
Reason, location, contact
The reason, location, and contact fields provide additional information about the signature. Filled values will be stored in the result PDF.
Append signature
JSignPdf can work in two signing modes. It replaces existing signatures with the new ones by default. If you enable the Append signature option, the new one will be appended and the old signatures will stay unchanged. *This option is disabled for encrypted documents.*
Certification level
The JSignPdf application can add a certificate to the signed PDF. There are four levels of certification:
NOT_CERTIFIED
CERTIFIED_NO_CHANGES_ALLOWED
CERTIFIED_FORM_FILLING
CERTIFIED_FORM_FILLING_AND_ANNOTATIONS
Hash algorithms
You can choose which hash function will be used for the signature. Available algorithms include SHA-256, SHA-384, SHA-512, and others.
Remember passwords
JSignPdf stores filled information when you are exiting the application, so it’s present when you run it the next time. Passwords are not stored by default, but you can allow them by enabling the Remember passwords option.
*Even if the password is stored in the encrypted form, we do not recommend storing passwords if your computer is used by more users!*
Encryption
JavaFX panel: Encryption & Rights
The Encryption option enables additional fields for support of PDF security. By using this you can either sign secured PDFs (and change the rights and user password) or you can add encryption to unencrypted PDF during the signing.
Encryption: Passwords
Fill owner and user passwords to set it in secured result PDF. If the input PDF is encrypted, the Owner password field has to match to owner password of the input PDF.
Encryption: Certificate
Fill the path to a certificate file (*.cer, *.crt, …) which should be used for the PDF encryption. Only the user who has the private key for the certificate will be able to open the file.
Rights
You can set allowed actions in encrypted result PDF by configuring the document rights. Normal rights are represented by checkboxes. Printing right has 3 levels, so the combo box is used for it.
Visible signature options
JavaFX panel: Signature Appearance
Enabling the Visible signature option allows you to create a visible field with signature directly in the signed PDF. You can configure parameters (position/texts/images) of the visible signature.
Page
Page number (counted from 1) to which the signature will be added.
Signature corners
The four inputs Lower Left (X, Y) and Upper Right (X, Y) define the position of the signature on the page. You can fill in float numbers (with decimal places) as input. Negative values are subtracted from the page width (for X) or height (for Y), allowing you to position the signature relative to the right or top edge.
The zero ([0,0]) position on the page is in the left bottom corner.
In the JavaFX interface you can place the signature visually by holding Shift and dragging a rectangle on the document preview.
Display
In the Display / Render mode option you can set which fields will be generated to visible signature.
Acrobat 6 layers
The Acrobat 6 layer mode option (enabled by default) allows you to control which signature layers will be added to the signed document. Acrobat 6.0 and higher recommends that only layers n2 and n4 be present. If the option is disabled then all layers will be created.
Texts and Images
Signature Text, Status Text, Image, and Background Image inputs define the content of fields in a visible signature. Font Size is used for setting the size of Signature Text, it should contain a positive decimal number.
Background image scale defines the size of a background image. Any negative number means the best-fit algorithm will be used. Zero value means to stretch, which fills the whole field — it doesn’t keep the image ratio. A positive value means the multiplicator of the original size.
Supported file formats for the Image and Background Image are GIF, JPEG, JPEG2000, PNG, WMF, BMP, and TIFF.
TSA — timestamps
JavaFX panel: Timestamp & Validation
To add a timestamp to the signature you will need a timestamping authority (TSA). Fill the server address into the TSA URL field and if the server requires authentication, choose the authentication type and fill either the TSA User and TSA Password fields or the path to the certificate’s private key (it has to be a PKCS#12 keystore) and the password. You can also set TSA Policy OID, which will be sent to the TSA server in the request, but typically the server uses the right policy by itself.
Certificate revocation checking
JavaFX panel: Timestamp & Validation
JSignPdf supports two standard ways of certificate revocation checking — CRL and OCSP. Most X.509 certificates support CRL, but it has some disadvantages (for instance the size of the list and possibly outdated information). OCSP solves these issues, but not all Certification Authorities (CA) support it.
CRL
A Certificate Revocation List (CRL) is a list of serial numbers for certificates that have been revoked or are no longer valid (RFC 5280). When CRL checking is enabled in JSignPdf, the revocation list is downloaded from the CA and embedded in the signed PDF.
OCSP
The Online Certificate Status Protocol (OCSP) allows real-time verification of a certificate’s revocation status (RFC 6960). Unlike CRL, which requires downloading a potentially large list, OCSP queries the CA for the status of a single certificate.
If OCSP is enabled in JSignPdf and the protocol is supported for the certificate, the OCSP request will be created and the response will be stored in the signed PDF. The URL of the OCSP server is retrieved from the certificate. If the OCSP part is not found in the signing certificate, the value from the default OCSP server URL field will be used.
Proxy settings
If some "online" feature (TSA, CRL, OCSP) is enabled and JSignPdf runs behind a firewall, you can set the proxy, which will be used for all internet connections. Proxy type DIRECT means no proxy will be used.
Using hardware tokens for signing
Steps to sign documents using hardware tokens:
Install PKCS#11 driver for your token. Check the vendor’s documentation and install a proper driver for your system;
Create a configuration file pkcs11.cfg somewhere on your system. It will be used to configure a Java SunPKCS11 security provider. (see PKCS#11 Reference Guide)
The content depends on your driver, you can try to start with a simple 2 lines:
name=Test
library=/path/to/your/PKCSDriver.so
Try to run JSignPdf with PKCS11 debug enabled:
java -Djava.security.debug=pkcs11keystore \
     -Djava.security.debug=sunpkcs11 \
     -jar JSignPdf.jar
If it doesn’t work, try to add parameter slot or slotListIndex into pkcs11.cfg file, e.g.:
name=Test
library=/path/to/your/PKCSDriver.so
slot=2
or
name=Test
library=/path/to/your/PKCSDriver.so
slotListIndex=1
Value used for slot or slotListIndex depends on how many certificates you have installed.
If the PKCS11 keystore type works properly in the GUI and you can use the certificate on your token, you’re ready to use it also in the batch mode.
java -jar JSignPdf.jar -kst PKCS11 -ksp 123456 document.pdfAdvanced application configuration
Some advanced options are not controlled from GUI or the command line. They can be only set directly in the appropriate configuration file.
conf.properties
The property file conf/conf.properties contain several option groups:
visible signature font settings
control the certificate checks
PKCS#11 support
enable more strict SSL handling
Java VM options for the Windows EXE launchers
If you need to change JVM properties for the Windows launchers (for example to increase the maximum heap), edit the corresponding .cfg file under the app subfolder of the installation. jpackage creates one .cfg per launcher:
| Launcher | Configuration file |
|---|---|
|
|
|
|
|
|
|
|
Each .cfg file contains a [JavaOptions] section with one java-options= entry per option. Add additional options as further java-options= lines, for example:
[JavaOptions]
java-options=--add-exports=java.base/sun.security.util=ALL-UNNAMED
java-options=-Xmx1g
java-options=-Dswing.aatext=true
The configuration files are shared between the installed build (%ProgramFiles%\JSignPdf\app\) and the portable ZIP (JSignPdf\app\ inside the extracted archive). |
Troubleshooting
Out of memory error
If you see an OutOfMemoryError in the program console, you need to allow Java to use more memory.
When running from the platform-independent ZIP, add -Xmx<size> to your Java command. The following example allows Java to use 512 MB of heap:
$ java -Xmx512m -jar JSignPdf.jarWhen running from the Windows EXE / MSI / portable ZIP, add a new java-options=-Xmx512m line to the .cfg file of the affected launcher (see Java VM options for the Windows EXE launchers).
SSL/TLS certificate errors
When JSignPdf connects to a server through HTTPS (e.g. to a TSA server for timestamping), it may fail with a SSLHandshakeException. This happens because Java ships with a keystore of trusted root certificates (cacerts), and if the server’s certificate is not signed by one of these trusted authorities, the connection is refused.
If you trust the server, you can add its certificate to the Java cacerts keystore using the bundled InstallCert tool (see InstallCert Tool).
Certificate not found in keystore
If JSignPdf doesn’t list your certificate when you press Load keys:
Verify the keystore file path and password are correct.
Check that the certificate is still valid (not expired).
If the certificate has a Key Usage extension, make sure it includes digital signature capability.
Timestamp server unreachable
If timestamping fails:
Verify the TSA URL is correct and the server is accessible.
If you are behind a proxy, configure the proxy settings (see Proxy settings).
Check if the TSA server requires authentication and configure it accordingly.
If you get an
SSLHandshakeException, see SSL/TLS certificate errors.
Other command line tools
InstallCert Tool
JSignPdf comes with a command line utility for adding server certificates to the Java cacerts keystore. This is useful when connecting to HTTPS servers whose certificates are not signed by a well-known CA (see SSL/TLS certificate errors).
$ java -jar InstallCert.jar

or

$ java -jar InstallCert.jar hostname[:port] [cacertPwd]
If you don’t provide a hostname argument, you will be asked for it.
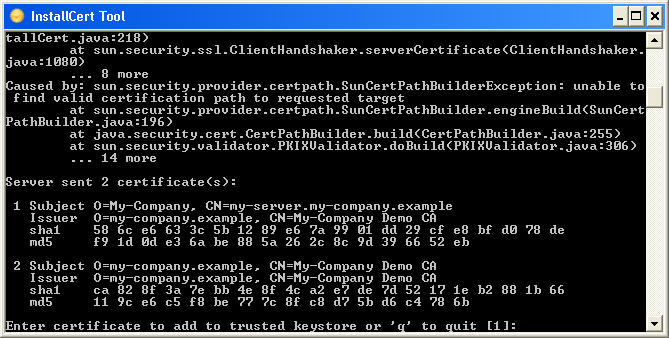
The certificate chain will be displayed and you can choose which one will be imported.